Intel Arduino 101 based tank with BLE and Blynk!
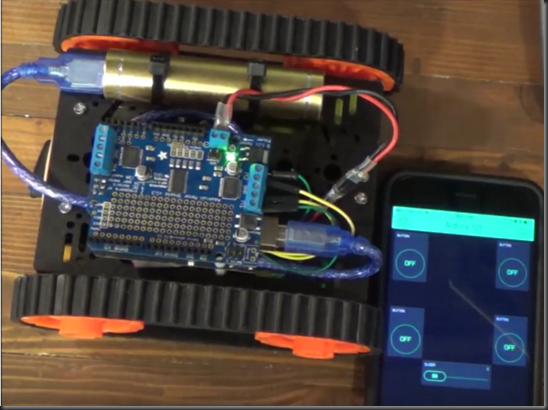
This project uses the Intel Arduino 101 board that has a built in IMU and (BLE) Blue Tooth Low Energy. For the remote control I used the free Blynk app which is is available for Android and iPhone, it allows you to rapidly drag and drop some buttons to create a user interface. The Chassis is a Dagu DG012 from Sparkfun.

I tried to power the whole rig from the 5 AA battery pack that came with the chassis but the Arduino kept resetting on low voltage. Ideally I would use a nice LiPo battery pack but I think it’s reaching to expect a beginner to learn about the care and feeding of LiPos and purchase a charger so I chose to power the motors separately from the Arduino using a USB Battery pack. Be sure to remove the optional battery jumper on the Adafruit motor shield or you can fry some things, the power sources need to be separate.
The video tutorial is broken into two videos, first hardware, mounting, powering the electronics.
The second video covers creating the phone app and Arduino code.
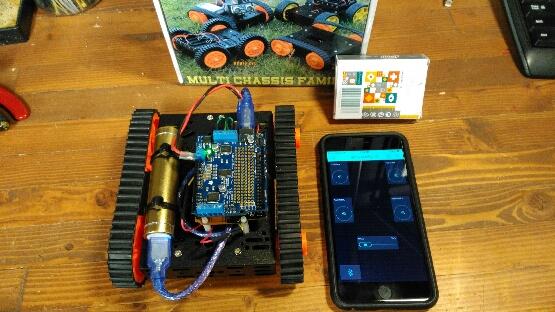
Rover variant
Quick start instructions:
Parts
- Tank Chassis or whatever platform you like.
- Polarized battery connector JST (Pictured I made one with header pins)
- 4 jumper wires
- Arduino 101 board
- Motor driver board (Adafruit Motor/Stepper Shield V2)
- 4 M2.5 nylon standoffs with nuts and screws
- 5 AA Batteries (For motors)
- USB Battery pack (For Arduino)
- Short USB A to USB B cable
- 1” heat shrink
- A few male and female header pins 0.1
- Two Zip ties

Hardware 

- Assemble the tank chassis, the instruction picture included is adequate, leave the top plate off of the chassis.
- Mount the Arduino to the top plate using standoffs. I prefer M2.5 nylon standoffs.
Wiring
- Use jumper wires to connect the motors to M1 and M2 headers on the Arduino Motor Shield.
- Install Polarized connector between the Motor Shield and the 5 AA battery pack. LEAVE THE MOTOR SHIELD JUMPER REMOVED TO ISOLATE MOTOR POWER FROM ARDUINO POWER!
- Remove the top plate and instert some Ziptyes to hold the USB battery connector.
Blynk App

- Download the Blynk App for Android or iPhone and create a new app
- Drag four buttons, a slider, and the BLE widget to your new app.
- Edit the slider, it needs to write 0-255 to V0
- The buttons are configured as momentary push buttons, they send a one while pressed and a 0 when released: Left Forward = V1, Right Forward = V2, Left Backward = V3 Right Backward = V4.
- From the Blynk app configuration click the button to email the authentication token to yourself, we will use this in the Arduino App.
Arduino Software
- Download the Arduino sketch from github
- Open the sketch using the Arduino IDE. As of writing this post your IDE version should be somewhere between 1.6.7 and 1.6.13, older versions might not support Currie boards and 1.8.0 might not compile the code (experienced by several people at our last workshop) .
- Open Tools –> Board –> Board Manager and search for “Arduino 101”, and make sure the board is installed, you can also upgrade to the latest version.
- Open Sketch –> Include Library –> Manage Libraries and search for “Adafruit Motor”, install the Adafruit Motor Shield V2 Library.
- Also search for and install the Blynk Library.
- Replace the auth[] Tolken with the one you emailed to yourself from the Blynk app created above.
- If you have multiple Arduino 101 boards rename the blePeripheral.setLocalName and blePeripheral.setDeviceName variables so the names will be unique.
IT’S GO TIME
- From the Blynk app click on the BLE widget, connect to your Arduino 101
- Put the Blynk App in run mode
- Play!
Here are a couple other arduino 101 chassis projects that I stole some inspiration from.
https://www.hackster.io/29284/ble-bot-9000-c150b8?ref=search&ref_id=arduino%20101%20ble&offset=2